KB6080
Inventory Location Management - Purchasing/Shipping Receipts
Updated May 15, 2024
Applies to : Purchasing, Shipping
This feature is designed to work with both Inventory and Raw Materials Inventory and is tied into the Receiving function in Purchasing and also in Ship To Inventory section of the Shipping module. The purposes of the feature is for users to have a way to do three things:
-
See what Inventory Locations are currently occupied and which ones are open. This will assist without knowing where to put items once they are produced or received.
-
Give the user the ability to Pre‑Assign an item that was ordered in purchasing or a job that is being produced to a Location. This way a user can "reserve" a location for an item that is due to be received or produced and put into inventory in the future. A new LocationAssignment table has been added to the database to hold these assignments.
-
Give the user the ability to use these assignments to be able to more quickly create PO Receipts and Ship to Inventory entries.
By selecting the assignments it will auto create these transactions with the assigned location code and quantity. All of this is managed through a single Location Management screen that has the following abilities:
-
Access to this location Management screen is from the PO Receiving screen and Shipping module.
-
Ability to see existing Locations and filter them by "Occupied", "Open", or "All" this way the user can see what locations are currently free to use.
-
Ability to see existing Assignments for any given location. When highlighting a location the user will see a list next to it showing if any Assignments have already been made against that location. This way the user can see if location is already reserved or not.
-
Ability to create Assignments for a given POLineItem or a job and also see if any Assignments have been made for the transaction. It will default to the quantity ordered when creating assignments and will reduce that default quantity as assignments are created.
IMPORTANT NOTE: In order to reflect On-Hand values in the Location Code the material item MUST be an inventoried item. You can assign a receipt to a specific location but it will not be recorded in inventory unless the Do Not Inventory checkbox is unchecked.
From Purchasing
Typically the Purchasing Agent or Material Management user would use the feature to Pre-Assign locations whereas the Shipper/Receiver would use this as a way to quickly assign locations to shipment.
Example:
35,000 - 19x25 Gloss Text is ordered partly for an order (15,000) with the remainder going into inventory. Each skid holds 10,000 sheets but the warehouse racking only holds 1 skid per location.
1. The Purchasing Agent completes a Purchase Order as per normal workflow.
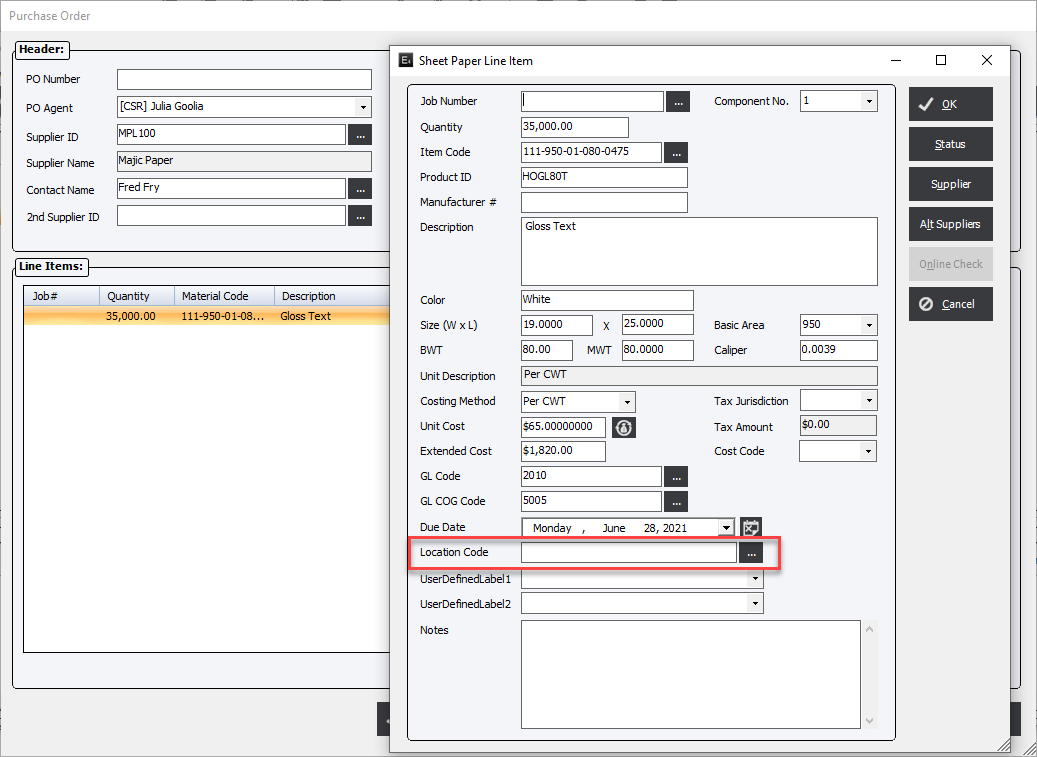
If there had been a default location, as indicated, this could be used as a default location within the Inventory Location Manager. This example does not have a default because the company normally buys multiple skids for inventory and as mentioned the racking only holds 1 skid at a time.
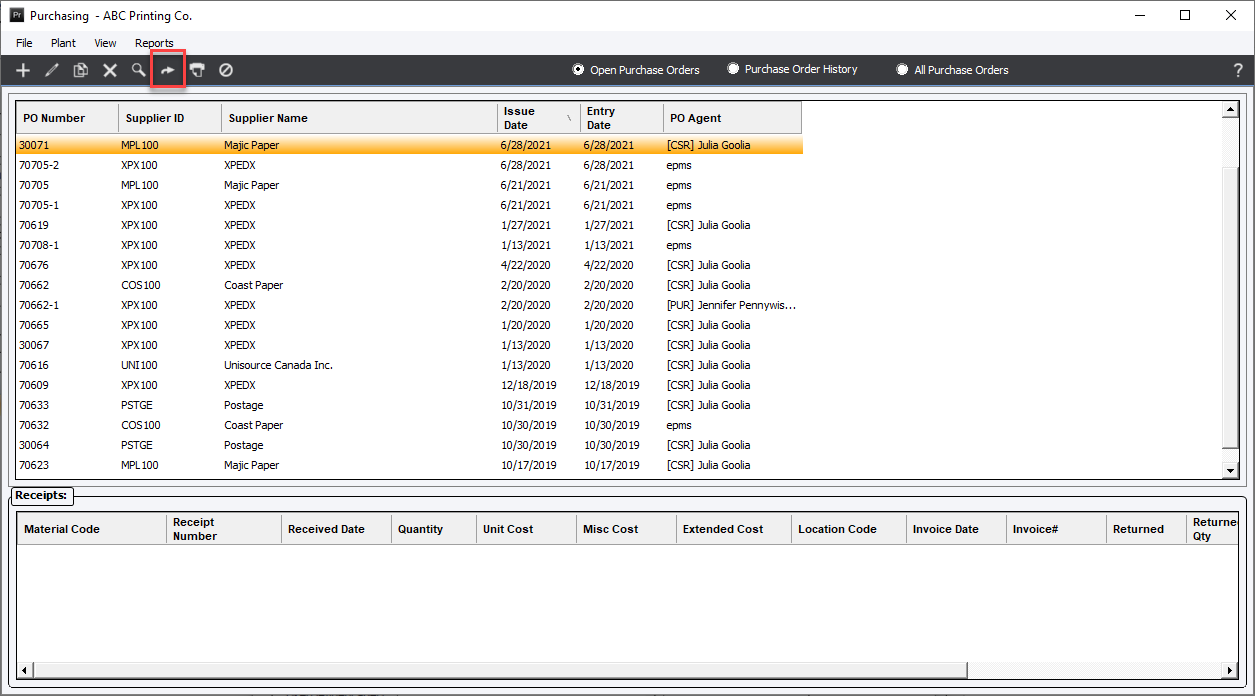
2. Next the Purchaser or Material Manager has the option to assign the locations they would like to have Receiving place the skids. To do this select the Receiving button or choose Receive from the File Menu.
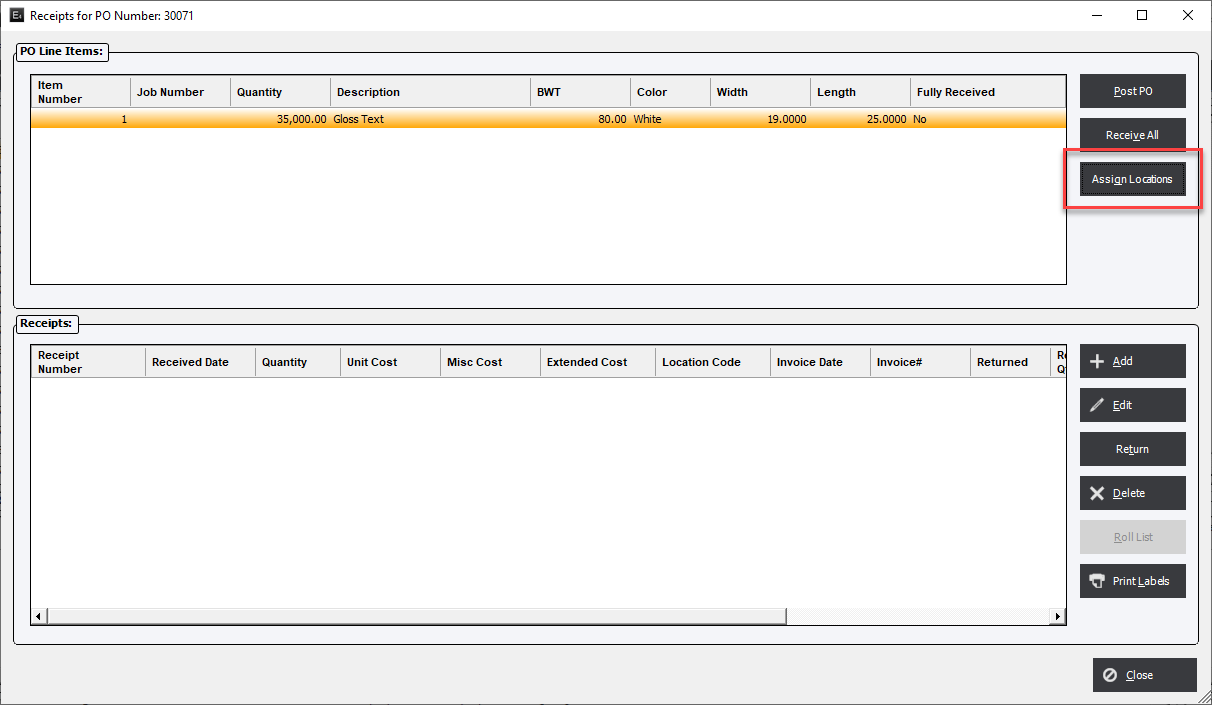
3. Select the Assign Locations Button to access the Inventory Location Manager. Locations can be assigned to more than 1 PO Line Item by repeating this process for each Line Item.
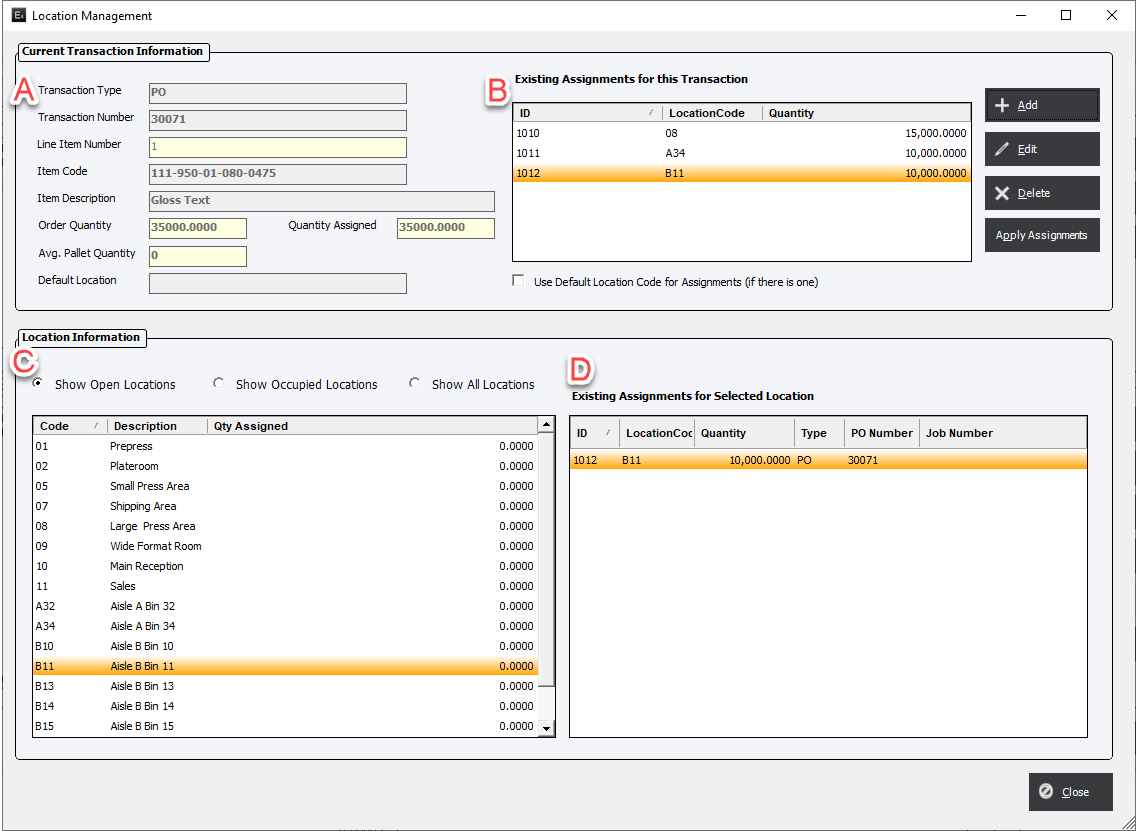
4. The Inventory Location Manager screen has 4 main areas.
-
Current Transaction Information - This Section is the PO Line Item information letting you know how many where ordered, how many are assigned, the Avg. Pallet Quantity (Finished Goods Only) and the Default Location if it is defined in the Material Standard.
-
Existing Assignment for this Transaction - Displays the quantity and Location Code for each assignment.
-
Location Information - with filters to show Open Locations, Occupied Locations and All Locations.
-
Existing Assignments for Selected Location - This shows what already occupies the select Location Code. It will be blank if nothing occupies this Location Code.
5. The Purchasing Agent or Material Manager first selects the Location Code in C to choose where the assignment will be. The click the Add Button, entering in the Quantity to assign to the selected Location Code.
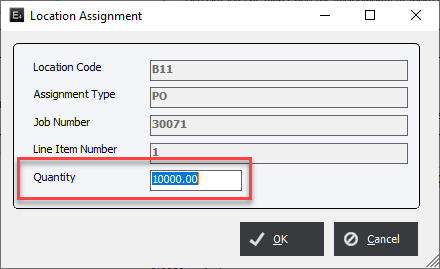
6. Once all assignments are determined click the Close Button. DO NOT press the Apply Assignment button. This will receive the shipment. This will be used in the next step.
Shipping/Receiver
The Shipper/Receiver can use the Inventory Location Manager in 1 of 2 ways;
To Receive items into pre-assign locations based on values provided by the Purchasing Agent or Material Manager OR
-
When receiving material the shipper/receiver click the Assign Locations Button to see if there are any pre-assigned locations.
-
If there are are the Shipper/Receiver simply click the Apply Assignments Button.
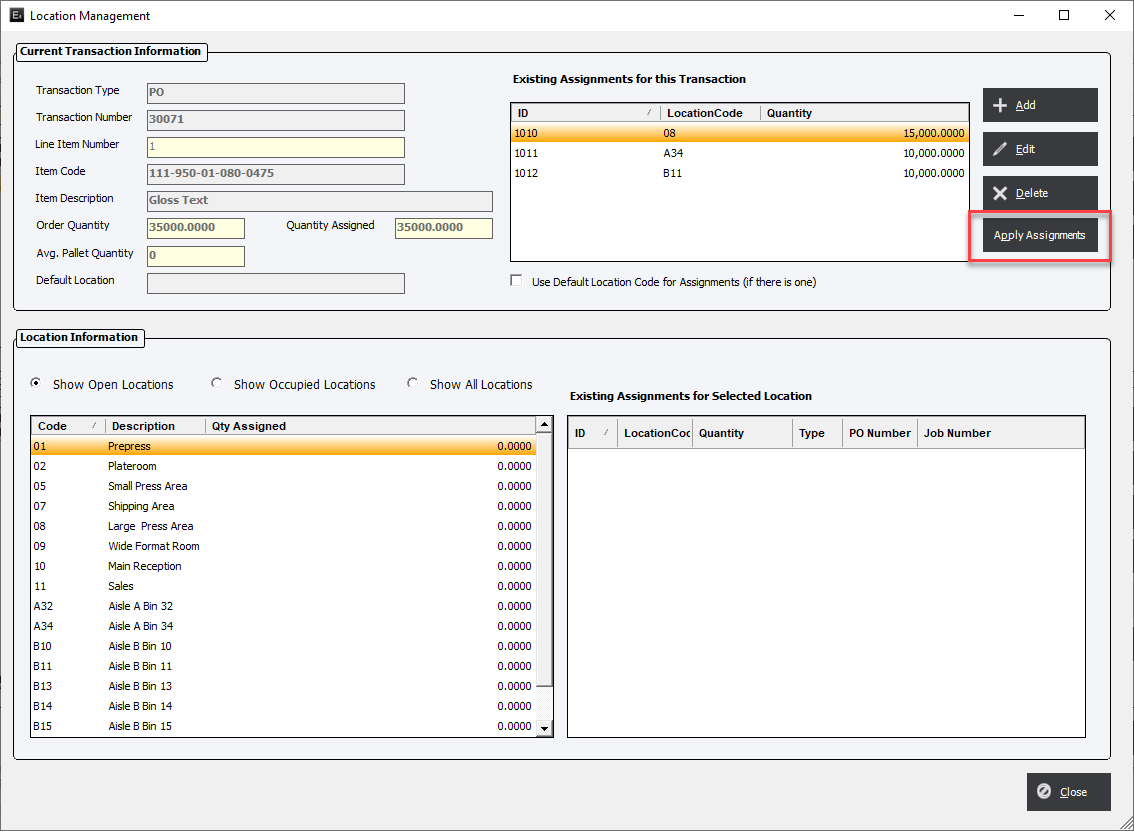
2. Use the system to quickly assign receipts to multiple locations.
When receiving material the Shipper/Receiver can use the assign receipts to one or more specific locations by first checking which Locations are available.
Show Open Locations
By selecting the Show Open Locations radio button which will only show Locations that do not have an On-Hand value associated with them. It will however show any pre-assigned but not yet received items in that Location.
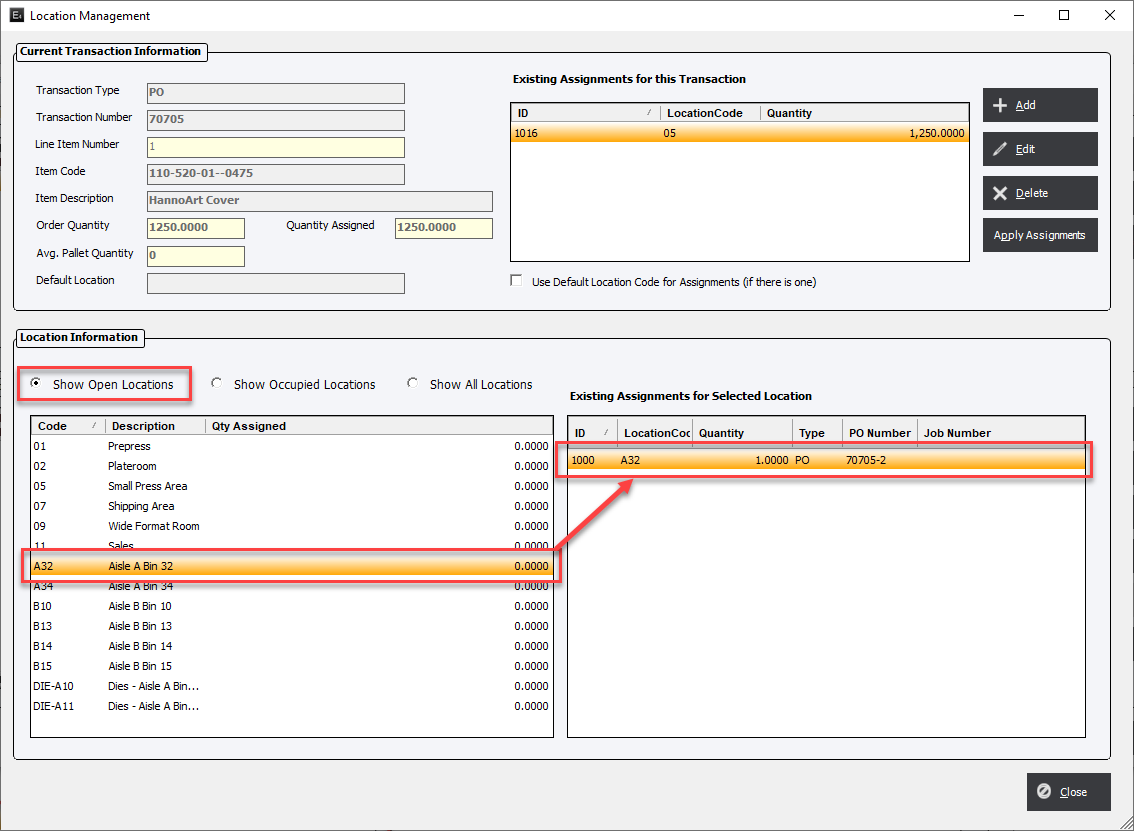
Note that Location A32 has Material pre-assigned to it but it hasn't been received. Also notice that Location 06, 08, 10 are missing from the list due to their positive On-Hand value. However it is possible to assign multiple receipts to a single location.
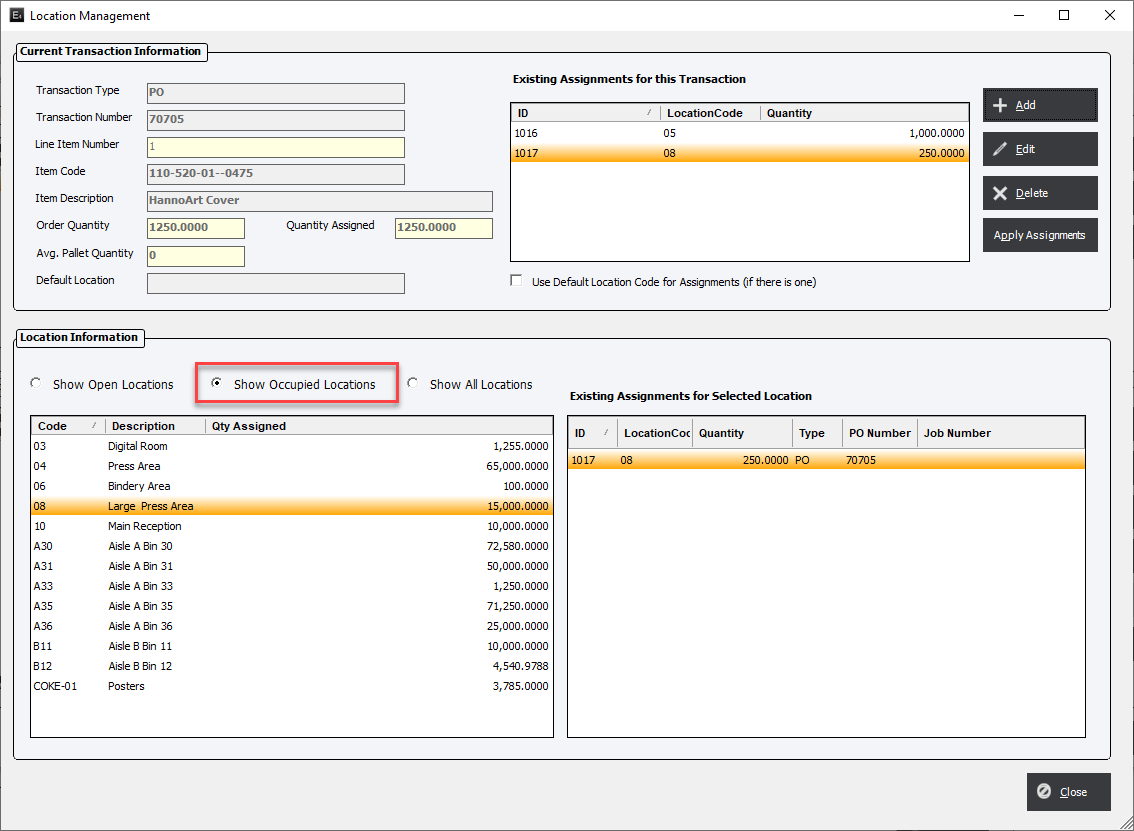
Show Occupied Locations
This radio button allows the users to see which Locations have positive On-Hand values associated with the Location Code. As before; it is possible to assign multiple receipts to a single location.
Show All Locations
This radio button allows the user to see all Location Codes and their respective positive On-Hand values. As before; it is possible to assign multiple receipts to a single location.
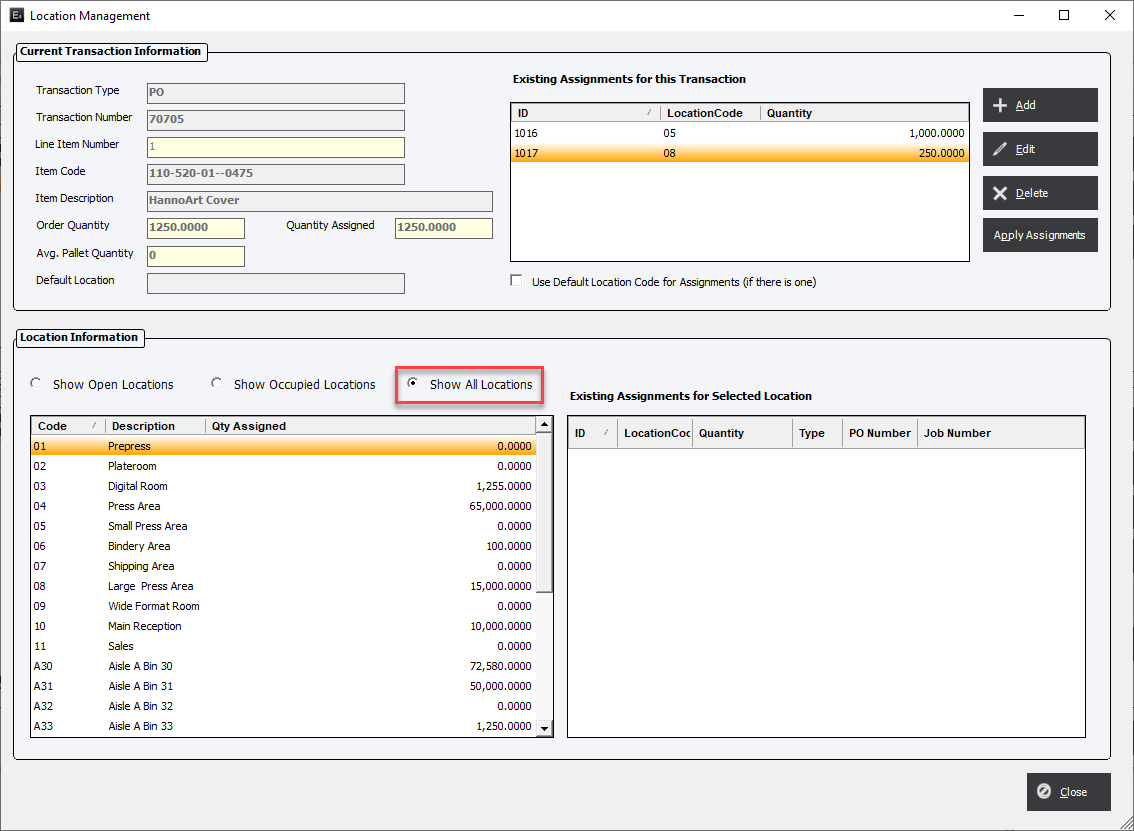
Once the Locations have been assigned the Shipper/Receiver clicks the Apply Assignments button to complete the receipt of the material.

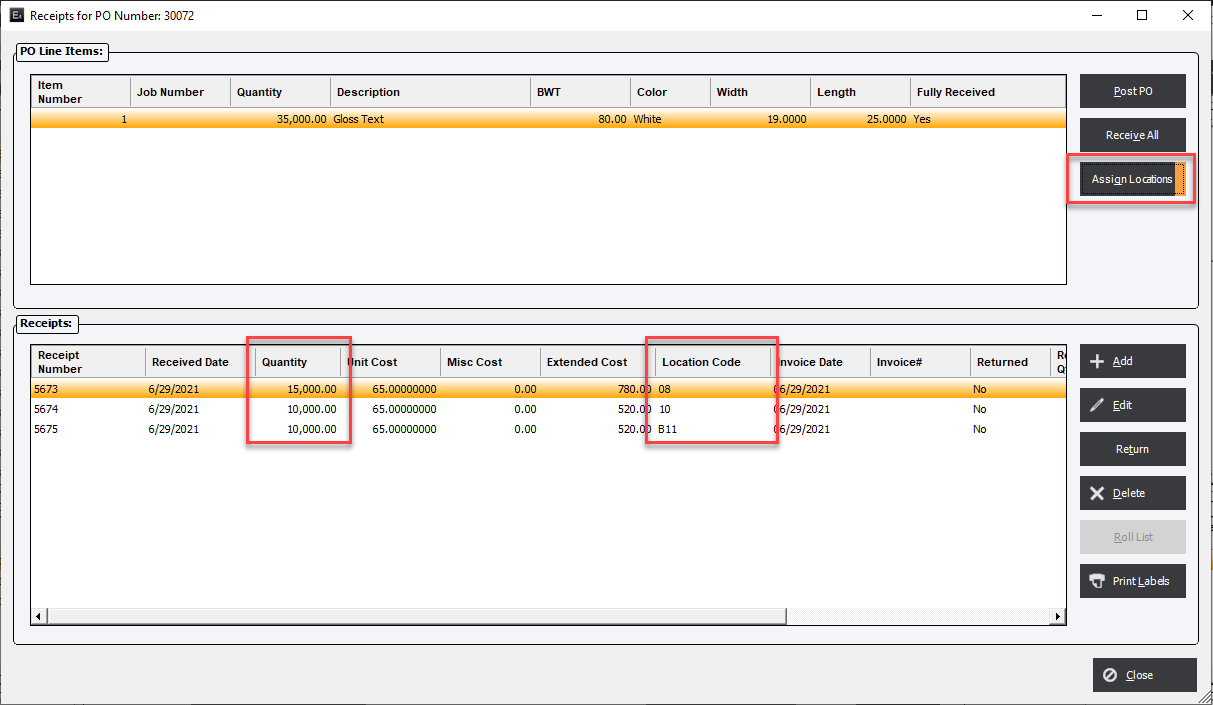
The Shipping Receipts screen will reflect the new assignments. Receipts that have any Assigned Locations will be indicated by an orange bar along the button.
