Invoicing Module Overview
Updated May 18, 2022
Eclipse Invoicing assumes that the user is not utilizing the integrated Accounting Modules (click to view discussion for integrated accounting modules).
There are 2 options for running Invoicing only through Eclipse. Both methods allow the system to integrate with 3rd party programs such as QuickBooks, PeachTree or Great Plains accounting systems.
Accounts Receivable Module
This method allows for the full use of the Accounts Receivable module to create invoices and receive payments. There are additional utilities to transfer journal entries to 3rd party accounting systems and retaining aging data within the Eclipse System.
See Accounts Receivable help to learn how to use this module.
Invoicing Module
This method allows the user to create and maintain a history of invoices only. There are additional utilities to transfer individual invoice data to 3rd party accounting systems.
The Invoicing Module allows the user to create partial invoices for jobs in process, or jobs that have been completed.
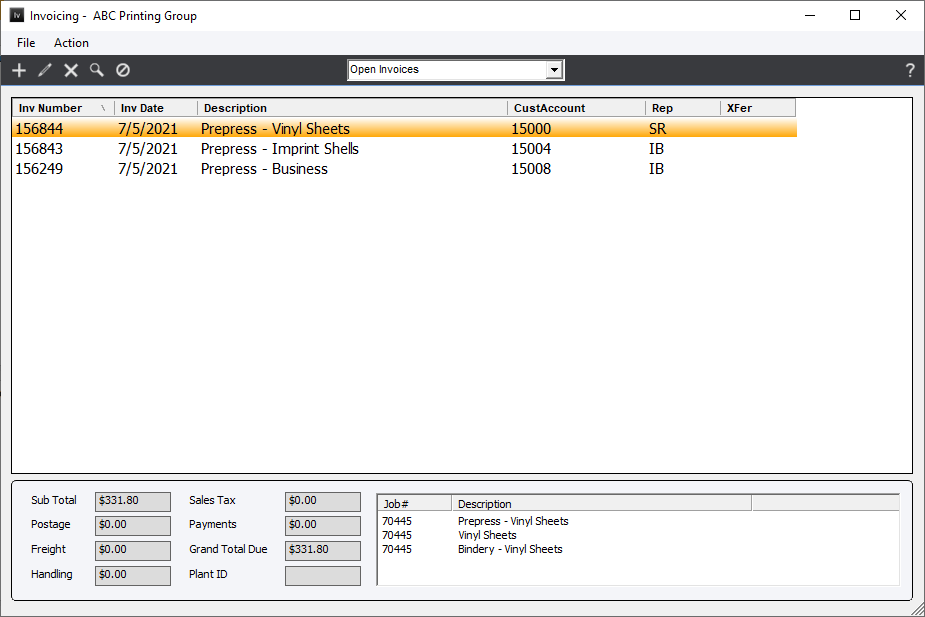
Invoicing Screen

The main Invoicing screen includes a list of invoices (or a list of jobs), pull-down menus, toolbar function buttons and data display fields. An invoice or jobs list will show, depending on the user’s selection, either: "Open Invoices" (default), "Posted Invoices" or "Completed Jobs". Note that the Plant menu option may or may not be visible, depending on whether the Multi-Plant option is set in Standards.
To display details for a specific invoice, highlight the invoice in the list and relevant information will be shown at the bottom of the screen. To add/edit or delete an invoice, click the appropriate toolbar icon or select the appropriate File Menu option. To print or post invoices, select appropriate Action Menu options.