Data Grid Columns
Updated September 7, 2021
Data Grids can be customized to create a unique view for a specific user. The Data Grid can include both predefined fields or can use custom sql database queries to collect information to add to the grid.
The following will illustrate how to do this. It will be assumed that user would like to display data from the “Customer” table: Account, Name, Address1, Address2, City, State.
1. Launch Enterprise 32 and display a list of customers: StandardsFileMaint./Customers/Customers.
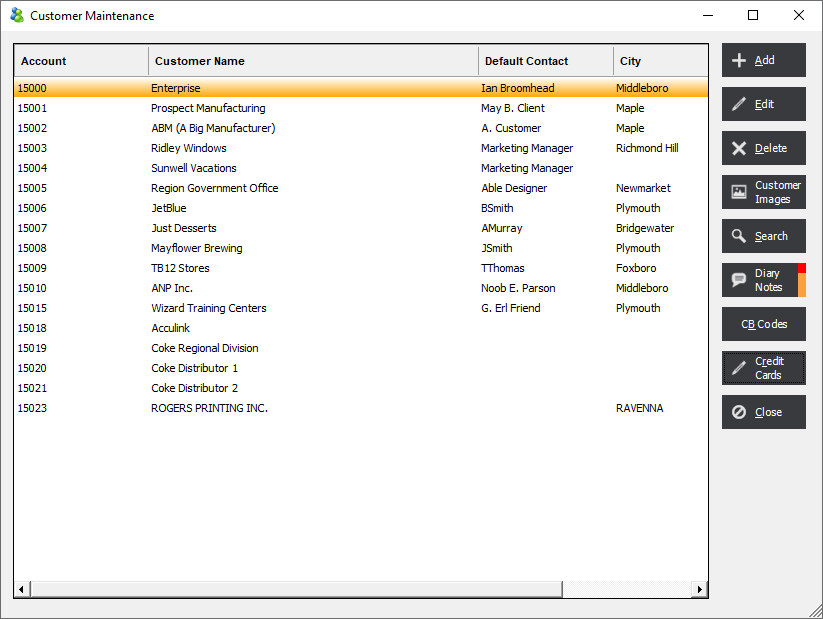
2. On the “Customer Maintenance” screen, right-click on a column heading. This action will open a drop-down list. Select “Options”. The "EPMS Data Grid Options" screen will be displayed.

3. Select the "Columns" tab. click the "Show all Fields" button
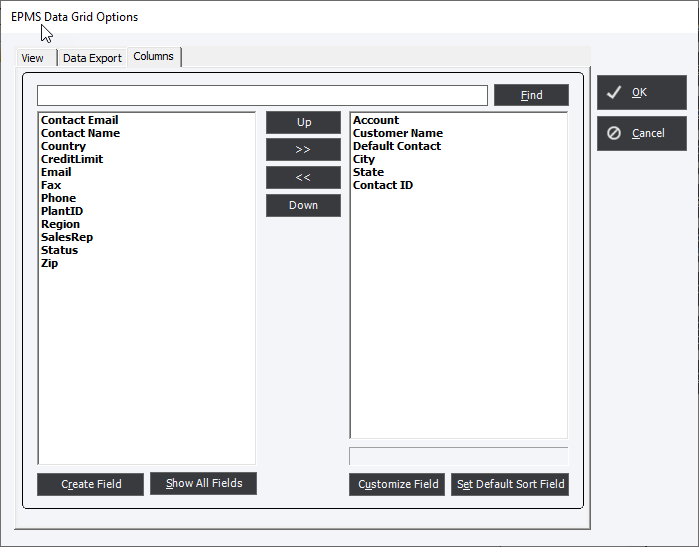
4. Select the field or fields of interest from the fields listed in the left-hand column and move them using the double arrows ">>" to right-hand column to include them as Headers for the Data Grid. The reverse method using the double arrows "<<" is used to remove any unwanted fields.
5. Additional predefined fields can be displayed by clicking the "Show All Fields" button.
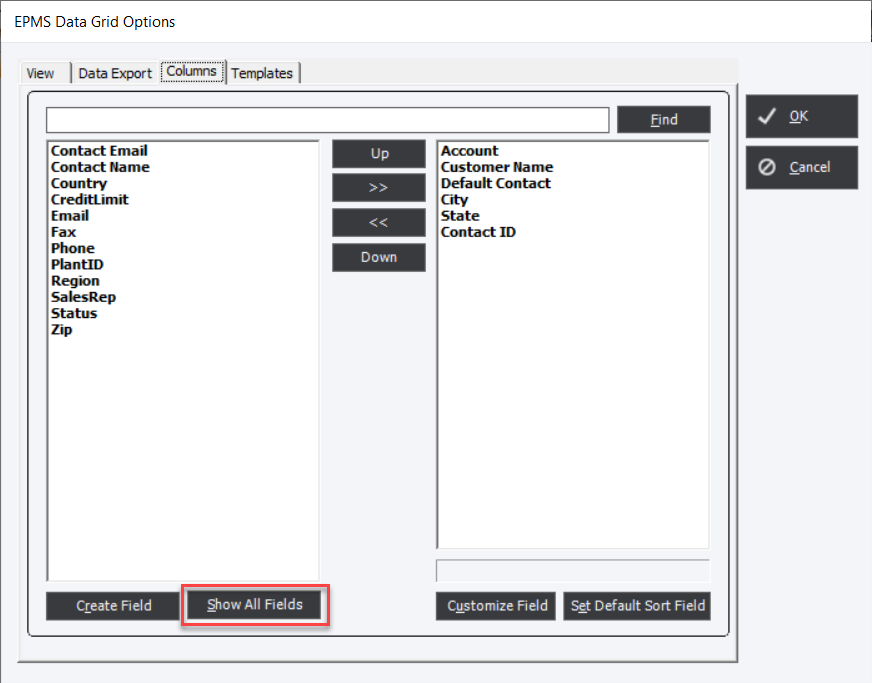
This will show all the sql fields in the stored procedures for the grid.
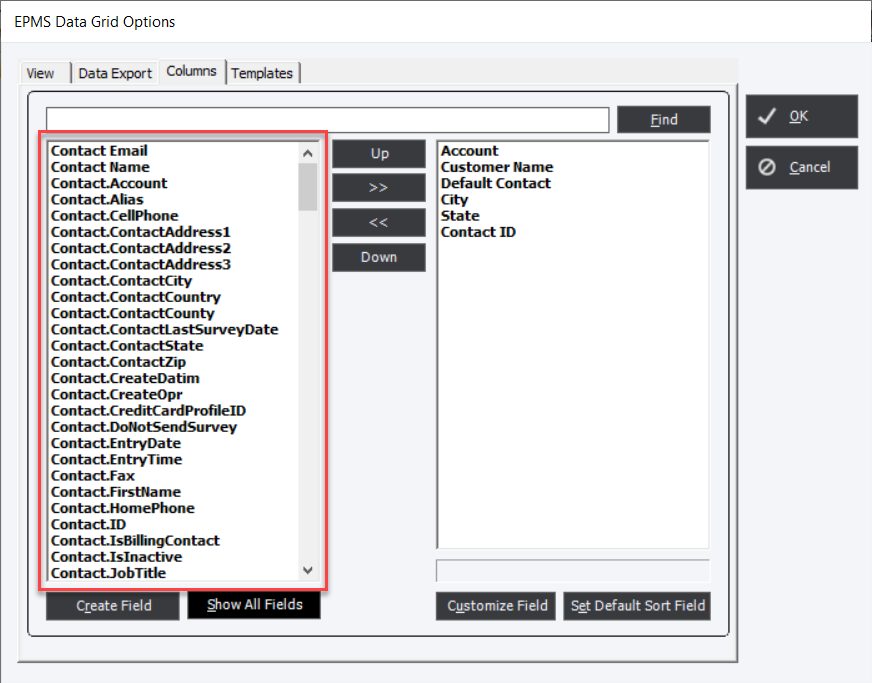
The fields will populate the list on the left. Each field has a prefix of the database table that it comes from.
The third way of accessing information to include in the Data Grid is to create a new field by clicking on the "Create Field" Button.

The Create Field and Customize Field share the same form so the information below applies to both buttons. Create Field is New and Customize Field is Edit.
Header Text
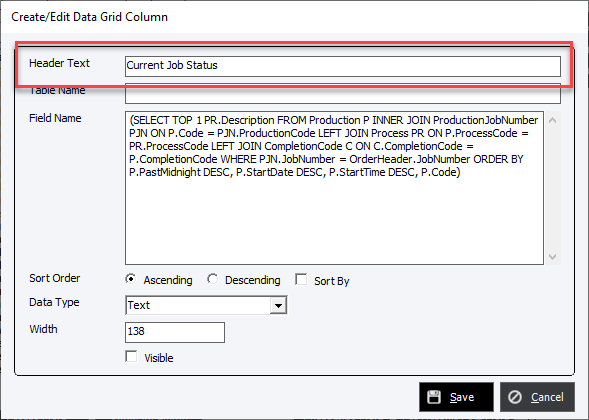
This field will be the text that appears on the Data Grid and can be changed to make it easier for the user to understand the information in the column. This text can be changed for any column not just custom fields.
Table Name and Field Name - 1 specific field from a specific database table
If the column contains only 1 field from a specific table in the database than simply define the database table in the Table Name and the specific Field in the Field Name.
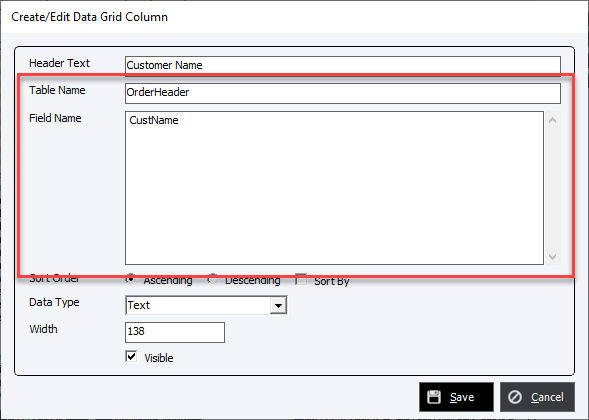
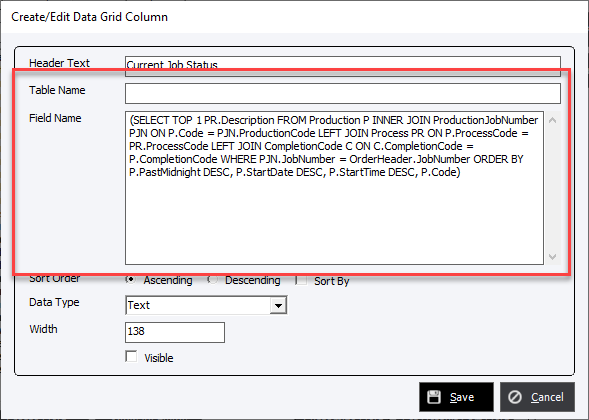
Table Name and Field Name - Using a sql query to populate the column.
To populate the data grid column with information derived from multiple sources or with a specific criteria from the database information leave the Table Name Blank and add the sql query to the Field Name.
Sort Order
This is how the data will be sorted by default
Data Type
There are 7 ways the data can be displayed
|
Data Type |
Description |
Example |
|
Text |
Simply any alphanumeric text |
Job #1234 is ****It's A RUSH!!!!**** |
|
Date |
Date based on individual computer date/time setting |
mm/dd/yyyy -- 09/25/2021 **Be careful; some date/time Windows settings will cause errors in the system. ** |
|
Boolean |
Converts field value of 0 to No and field value of 1 to Yes |
|
|
Number |
No decimals |
1, 2, 43566 |
|
Number2 |
2 decimals points |
1.00, 2.00, 43566.00 |
|
Number3 |
3 decimals points |
1.000, 2.000, 43566.000 |
|
Number4 |
4 decimals points |
1.0000, 2.0000, 43566.0000 |
Width
Default width of the column based on pixels.
Visible
The Visible checkbox works only when creating a new field. If the checkbox is checked than the newly created field will appear in the right listbox. If it is unchecked it will appear in the left listbox. This is a status field and will reset to either checked or unchecked depending on which list it is in when the Options window is closed.
Add/Removing Column
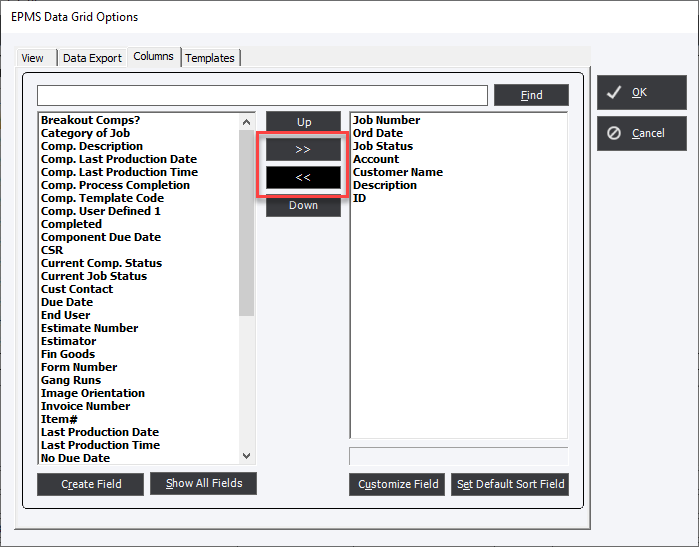
Select the field or fields of interest from the fields listed in the left-hand column and move them using the double arrows ">>" to right-hand column to include them as Headers for the Data Grid. The reverse method using the double arrows "<<" is used to remove any unwanted fields.
Change Column Order
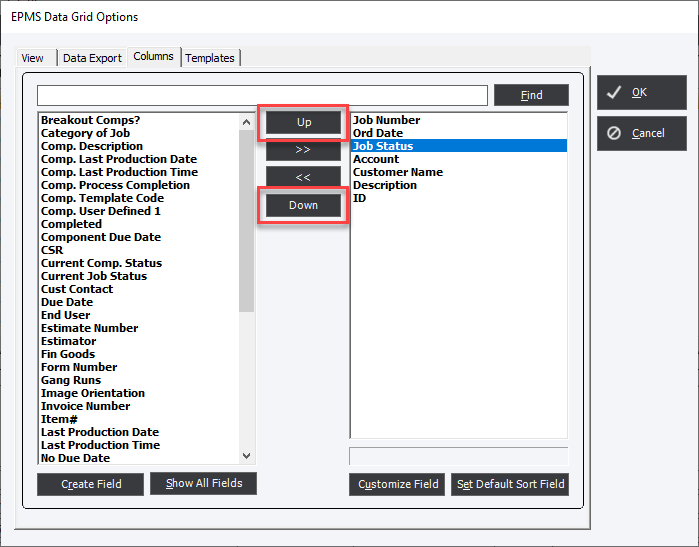
Select a field in the right hand list and use the Up and Down buttons to change the position. Do not change the order of the top field.
After the desired fields have been selected and arranged, click "Ok". The Data Grid will change to the new settings. It is advisable to IMMEDIATELY close the current data grid which saves the current settings to the database. Then reopen the module or utility.