Inks
Updated October 17, 2022
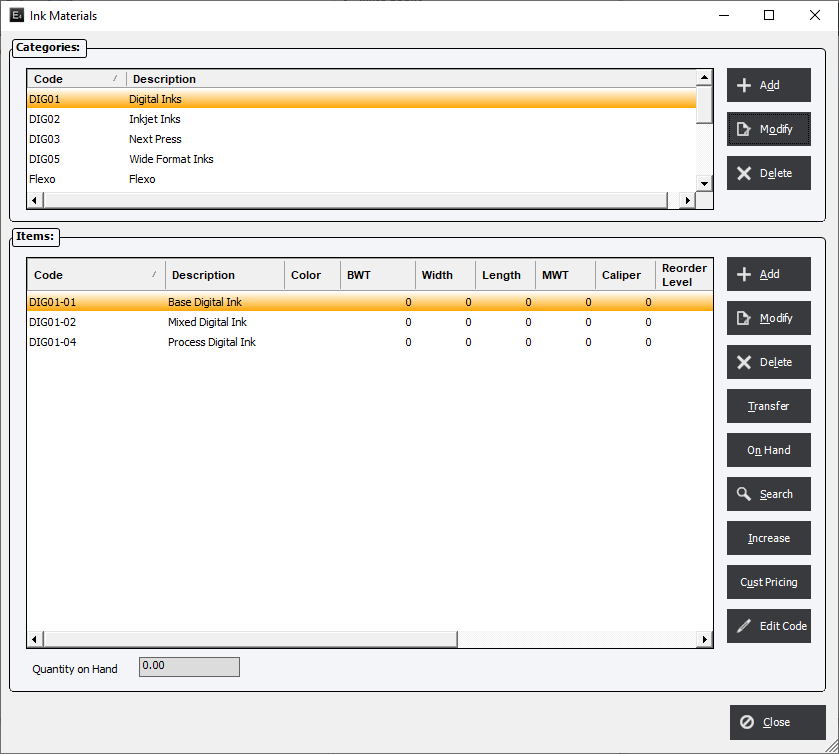
Select menu option StandardsFileMaint./Materials/Inks and the system will display the "Inks" screen. Data for printing inks will be entered into the system using this menu selection.
Inks Screen

Ink Categories will be displayed in the top window (Categories), and as each category is highlighted, the system will list the individual inks defined for that category in the bottom window (Items).
The user will note the field Quantity on Hand at the bottom of the screen. As one would expect, this field will display the inventory On Hand Quantity for an item highlighted in the bottom window.
Categories Buttons
Add : Create a new ink category.
Modify : Modify an existing ink category.
Delete : Remove a category from the list. NOTE : Removing a category does NOT remove the individual Items within the category. Items must be individually removed to delete them from the database.
Items Buttons
Add : Create an ink Item.
Modify : Edit an existing item.
Delete : Permanently remove the Item from the database. It will not, however, remove it from any existing Estimates or Orders. If the Item exists in an Estimate or Order the system will display a warning of its no existence but will not ask for a replacement.
Transfer : Allows the user to transfer inks from one category to another.
On Hand : Use the On Hand function to re-set the quantity or cost of an inventory item. Individual items with the option Do Not Inventory with have the On Hand button grayed out.
Search : Allows the user to search the category.
Increase : Increase the Estimated Unit Cost grid.
Cust Pricing : Allows the user to set up special pricing when a specific customer is selected in Estimating/Order Entry.
Edit Code : Allows the user to change the Material Code throughout the database.