Add/Edit Receipts
Updated September 7, 2023
The Receive function allows users from both Shipping/Receiving and Accounts Payable to enter information about shipments received for a Purchase Order.
Add a Receipt
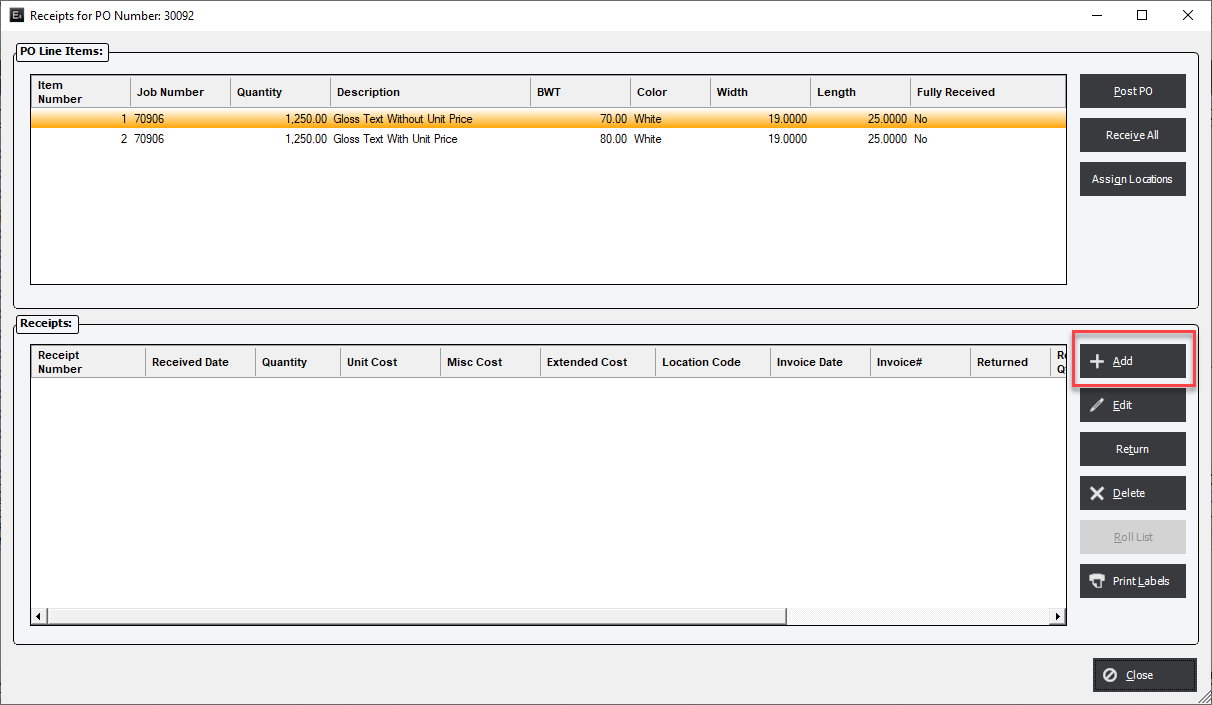
Select a PO Line Item and click Add to create a Receipt.

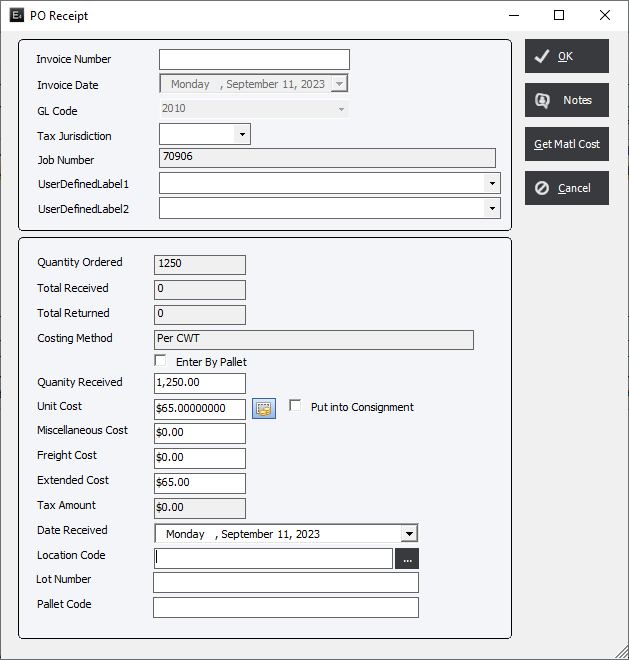
The system will then display the PO Receipt screen.
There are 2 sections on the PO Receipt form.

Top section
This section is used to enter in accounting information when the system is configured to use a 3rd Party accounting system or none at all.
If the system is configured to use with EPMS Integrated Accounting then the Supplier Invoice Number and GL Code is entered through the Accounts Payable module.
Invoice Number : Enter the supplier’s invoice number .
Invoice Date : Select an Invoice Date that the Supplier Invoice was received from the drop-down list.
GL Code : If desired, the user may assign a GL Code to the line item for eventual transfer as a payable to a 3rd Party Accounting application.
Job Number (disabled) : The Job Number will be displayed if the PO line item has been created for a job.
Tax Jurisdiction : The applicable Tax Jurisdiction code, if any, will be displayed.
UserDefinedFields : Allows the user to enter information created by the UDFs.
Bottom Section :
Quantity Ordered (disabled) : This field will display the quantity ordered by the Purchase Order.
Total Received (disabled) : This field will display the total quantity that has been received. If there are multiple Receipts against this PO Line Item the number will be reduced by the total amount already received.
Total Returned (disabled) : This field displays the sum of all material Returned for this Receipt Line Item.
Costing Method (disabled) : Costing Method established for the material item in Standards.
Quantity Received : Enter the quantity received in the shipment. By default the system will subtract the Total Received from the Quantity Ordered values for the PO Line Item.
Enter by Pallet : If the item is Inventoried and designated to Track by Pallet/Skid the user can opt to assign the a Pallet Code either manually or automatically.
Unit Cost : The Unit Cost established for the item on the PO Line Item.
Currency Code Button : Allows the user to convert the Unit Cost to a specific Foreign Currency.
Misc/Fixed Cost : Enter a number if it is applicable. This value can also come from the Outside Services Fixed Unit Cost field multiplied by the Fixed Quantity value on the same form.
Freight Cost : This value must be entered manually by the user.
Extended Cost : This value is a calculation of the Quantity Received multiplied Unit Cost plus the Miscellaneous/Fixed Cost plus the Freight Cost. However, if this value is overwritten it will revert back to the calculated values when the Receipt is reopened.
Tax Amount (disabled) : The system will calculate and display the applicable tax based on the value in the Tax Jurisdiction.
Date Received : Click the drop-down to select a date the material was received.
Location Code : An inventory location may be assigned to the item being received.
Pallet Code : If the user has selected Enter by Pallet they have the option to assign the a Pallet Code either manually or automatically. If there are multiple Pallets/Skids for the Receipt than the user will need to Add a Receipt Line for each Pallet/Skid.
Editing a Receipt Line Item
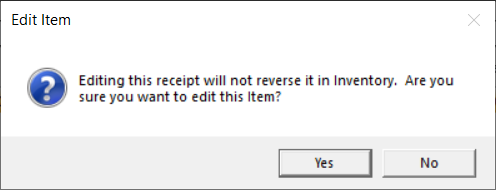
If editing, the system will display the following dialog.
